Self-Tape Lighting: How to Reduce Glare on Glasses
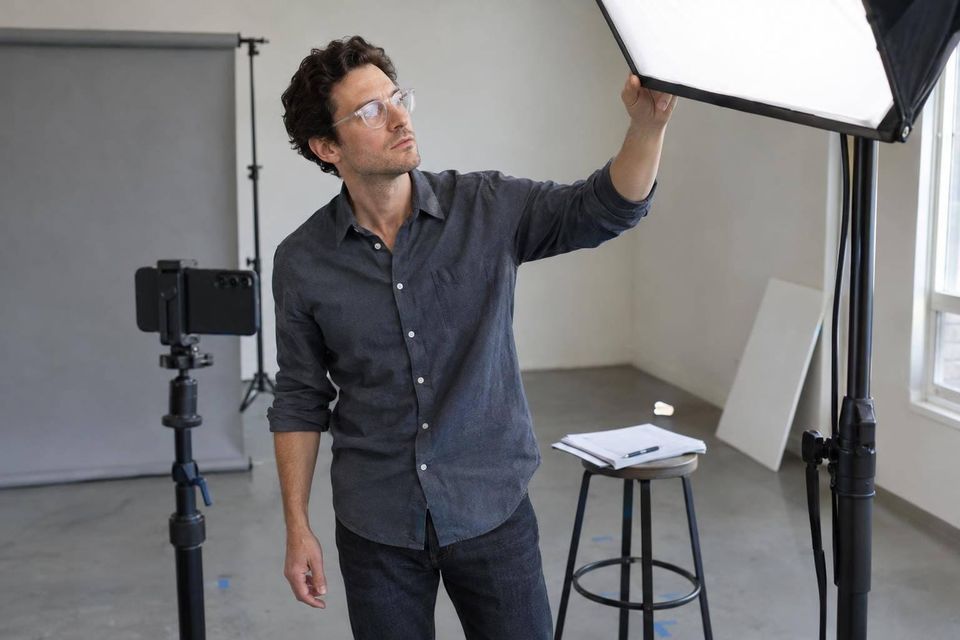
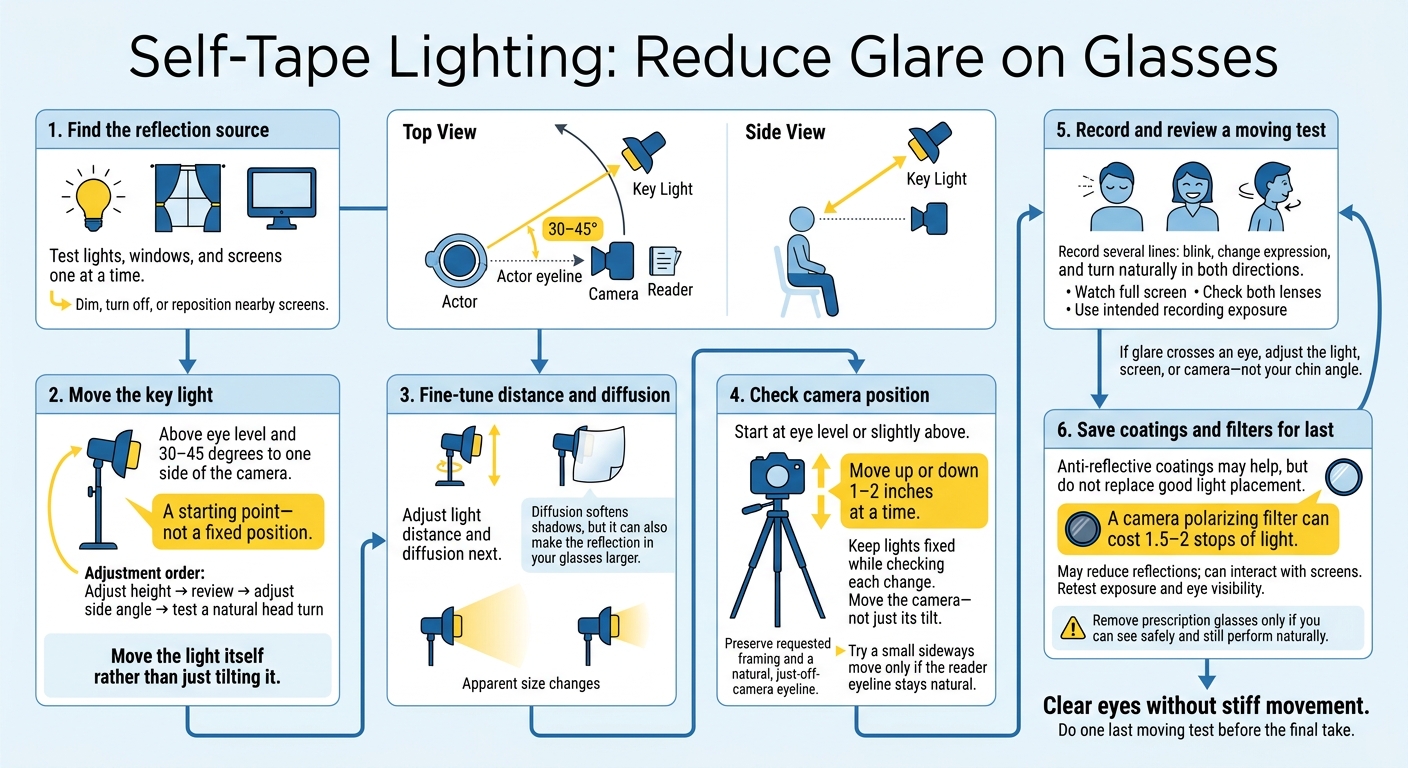
To reduce glare on my glasses, I start with the light above eye level and 30–45 degrees to one side of the camera. Then I record a short test while moving naturally - not just holding still.
My check is simple:
- Find the source: Test lights, windows, and screens one at a time.
- Adjust the setup: Change light height, angle, distance, and diffusion. If needed, move the camera in 1–2-inch steps while keeping framing and eyeline natural.
- Check both lenses: Review the recording at full screen and at my planned exposure.
- Save filters for last: Anti-reflective coatings may help; a polarizing filter can cost 1.5–2 stops of light.
My goal: <u>clear eyes without stiff movement</u>. I adjust the setup - not my performance - and do one last moving test before the final take.
Self-Tape Lighting: Reduce Glare on Glasses
How to avoid glare on your glasses in self-tapes | Virtual On-Camera Lab Tech Tips
sbb-itb-daa9c42
Move the Key Light Higher and to One Side
Adjust the key light first. Check the frame after each move, including while you turn your head naturally.
Start Above Eye Level and 30–45 Degrees to One Side
Place the light above eye level, about 30–45 degrees to one side of the camera. This is a starting point, not a fixed position.
Adjust the height first and review the frame. Keep the height that works best, then adjust the side angle and test again with a natural head turn.
Move the light itself rather than just tilting it. Changing its position changes the reflection path. Tilting alone may leave glare in the frame.
If glare remains, adjust the distance and diffusion next.
Fine-Tune Light Distance and Diffusion
Diffusion softens shadows, but it can also make the reflection in your glasses larger. Light distance matters, too. Moving the light closer or farther away changes its apparent size - and how easily it reflects in your lenses.
Check Camera Position and Head Movement
Once the key light is set, check whether the camera angle still creates reflections. Moving the camera can shift a reflection out of view without moving the light.
Judge glare through the recording camera, not from beside it or in a mirror. Keep the requested framing, and place your reader near the lens so your eyeline stays just off-camera.
Test Small Camera and Screen Changes
Start with the camera at eye level or slightly above. Move it up or down 1–2 inches at a time, leaving the lights fixed as you check each change. Change the camera’s position, not just its tilt: moving it changes the reflection path. Keep the angle natural.
Try a small sideways move only if your reader eyeline still looks natural. Before making more adjustments, dim, turn off, or reposition nearby screens. That bright rectangle may come from a monitor or phone rather than the key light. Check again at your intended recording exposure.
Record a Short Performance Test
Record several lines while looking toward your reader, blinking, changing expression, and turning naturally in both directions. Watch the clip full screen, checking both lenses as you turn left and right.
If glare crosses an eye, adjust the light, screen, or camera - not your chin angle. Your setup should leave you free to move naturally.
Treat Lens Coatings and Filters as Backup Options
Turn to coatings and filters only after adjusting the light and camera position. Anti-reflective coatings can reduce lens reflections, but they don’t replace good light placement.
A camera polarizing filter may reduce reflections, but it can cost 1.5–2 stops of light and interact with screens. Retest exposure and eye visibility afterward. Remove prescription glasses only if you can see safely and still perform naturally.
Conclusion: Check for Glare Before the Final Take
Use a Pre-Take Lighting Checklist
Before the final take, check sources of reflections, screen brightness, key-light height and angle, distance, diffusion, camera height, framing, and the reader’s eye line.
Record a short test using your filming setup. Then review both lenses to make sure the eyes stay clear as the reader moves naturally.
FAQs
How can I reduce glare without creating deep shadows?
Use soft, diffused lighting from softboxes or LED panels placed at a 45-degree angle to your face. This helps light your face evenly. Skip harsh overhead lighting - it can cast deep shadows and add reflections.
If shadows remain, place a small, soft light behind you to add depth and help you stand out from the backdrop. Keep all lights at a consistent color temperature between 5,000K and 5,600K for a professional look.
Why does glare remain in only one lens?
Glare can appear in just one lens when light reflects off it toward the camera but doesn’t reflect the same way off the other. This usually happens when your head or a light is slightly off-center.
Adjust the angle of your lights or move your head slightly until both lenses are glare-free. Keep your lighting and position balanced, then check the camera view to make sure your eyes remain visible as you move naturally.
How can I keep my eyes glare-free during head turns?
Place soft, diffused lights at a 45-degree angle on either side of you to reduce reflections in your glasses. Keep lights away from directly in front of your face or overhead, where they can create glare as you move.
Record a test from your camera’s position while turning your head naturally. Check that your eyes stay clearly visible and your lenses remain free of reflections.